The privacy trigger is a useful feature that allows users to modify their preferences on any page on your website. However, it takes up quite a bit of space and can also lead users to adjust their preferences more frequently. For this reason, I often receive questions from clients asking whether it’s possible to display the privacy trigger only when someone hasn’t consented to cookies and to “remove” the trigger once someone has accepted cookies.
Table of contents:
Is it allowed to implement this? What’s the objective? Implementation in Google Tag ManagerIs it allowed to implement this?
The idea of the privacy trigger is to provide visitors with the ability to modify their preferences at any time. According to the rules, this must be “as easy” as providing their preferences initially. However, it’s not entirely clear whether the privacy trigger is a strict requirement, as the ability to adjust consent is also available in the Cookie Declaration of Cookiebot. Between always showing the privacy trigger and never showing it, there’s also an option to display the trigger only when someone hasn’t given consent for cookies. In the next section, I’ll explain how to do this.
What’s the objective?
The idea is to add a bit of CSS to:
- Display the trigger when someone has provided their preferences but hasn’t given consent for the use of analytical and marketing cookies.
- Hide the trigger when someone has provided their preferences and has given consent for the use of analytical and marketing cookies.
These are two separate CSS scripts that we will load via two tags in Google Tag Manager.
If the privacy trigger is turned off in Cookiebot, you’ll need to enable it first. If it’s disabled, the codes below are not necessary.
Implementation in Google Tag Manager
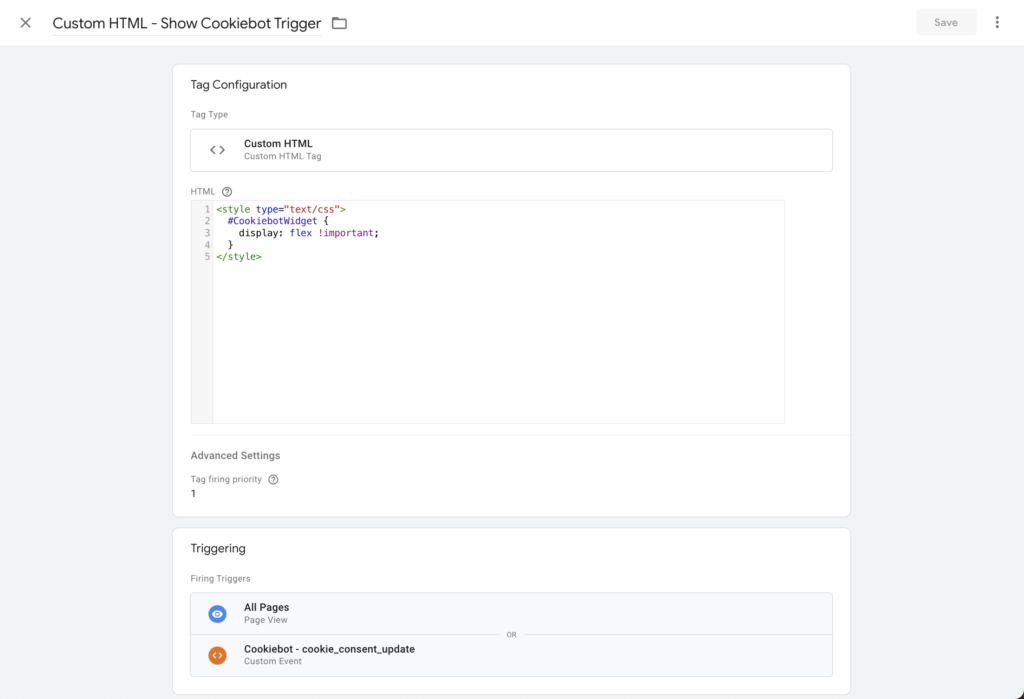
Tag 1: Adding the CSS script to display the privacy trigger

Create a Custom HTML tag and add the following code:
<style type="text/css">
#CookiebotWidget {
    display: flex !important;
}
</style>
Under ‘Advanced Settings’, set the Firing Priority to 1 so this tag always loads before the second tag (which hides the trigger depending on the given consent).
Attach two triggers to this tag: ‘All Pages’ and ‘cookie_consent_update’. If you haven’t created the second trigger yet, do so by setting up a Custom Event trigger and entering cookie_consent_update as the event name.
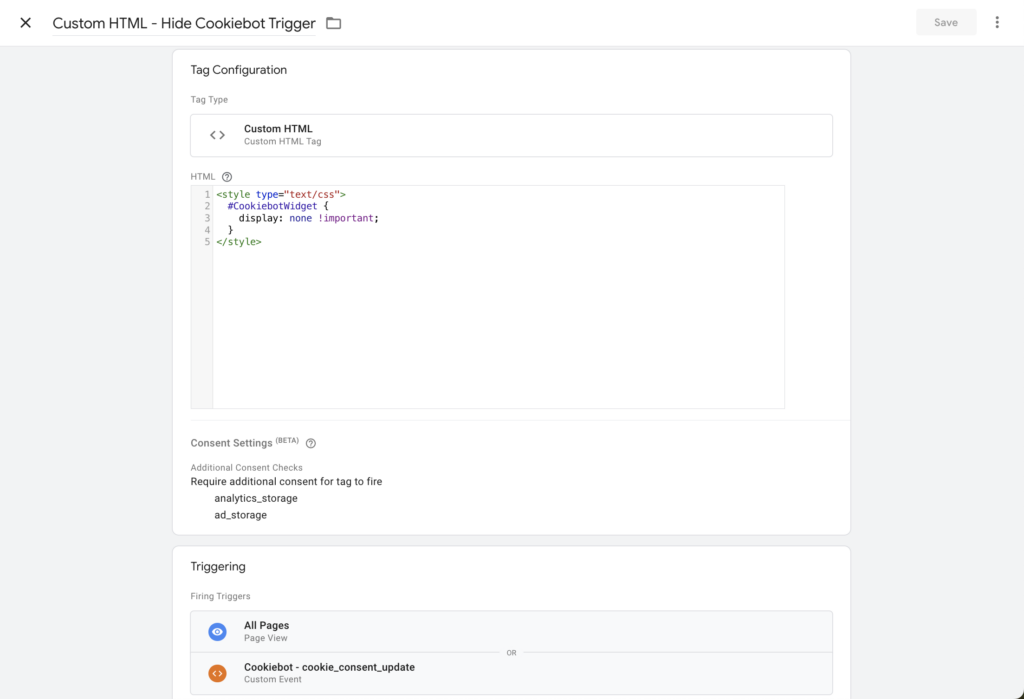
Tag 2: Adding the CSS script to hide the privacy trigger

Create another Custom HTML tag and add the following code:
<style type="text/css">
#CookiebotWidget {
    display: none !important;
}
</style>
Under Consent settings, set the required consent to ‘analytics_storage’ and ‘ad_storage’. This ensures the tag is only triggered when the user has accepted both categories.
Attach the same two triggers to this tag: ‘All Pages’ and ‘cookie_consent_update’. On each page view or consent update, both tags will be executed so that the trigger is always visible when consent hasn’t been given and hidden when full consent has been provided.
