When you, your colleagues, your webdeveloper and/or your marketing agency regularly visit your (own) website you probably don’t want these visits to skew your analytics data. GA4 does not automatically filter your own IP address. This is something you'll have to do manually. In this article I'll walk you through this process step-by-step.
Setting up IP filters in GA4 involves two steps:
- Part 1: Define internal traffic.
- Part 2: Configure data filters.
Part 1: Define Internal Traffic
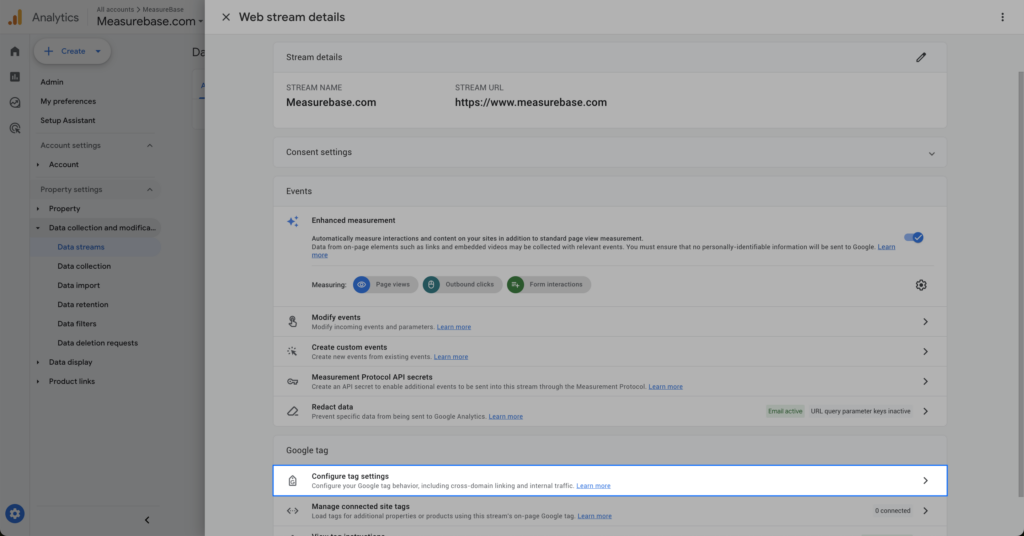
Step 1: Go to Admin > Data Streams > Select the relevant stream.
Step 2: Under Google Tag, click on Configure Tag Settings.
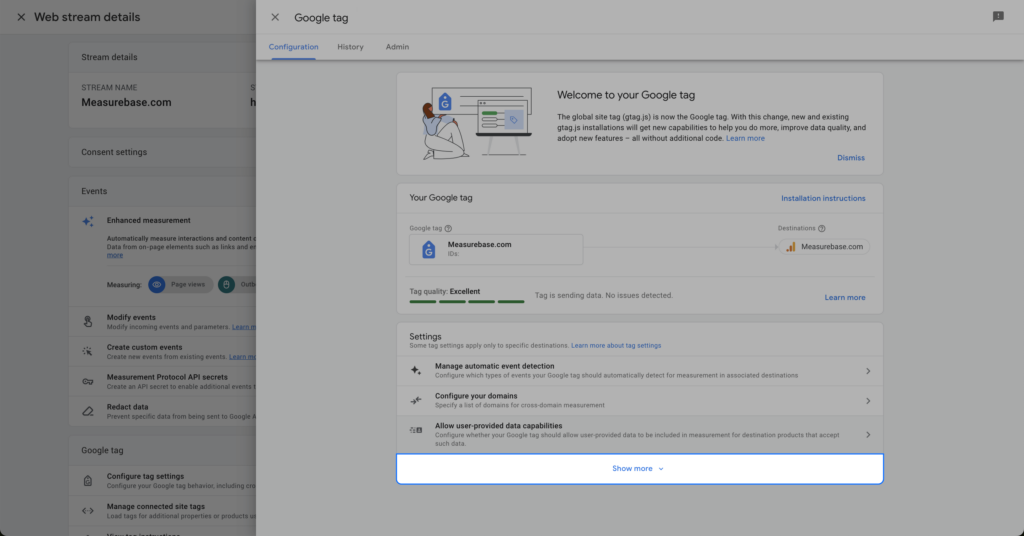
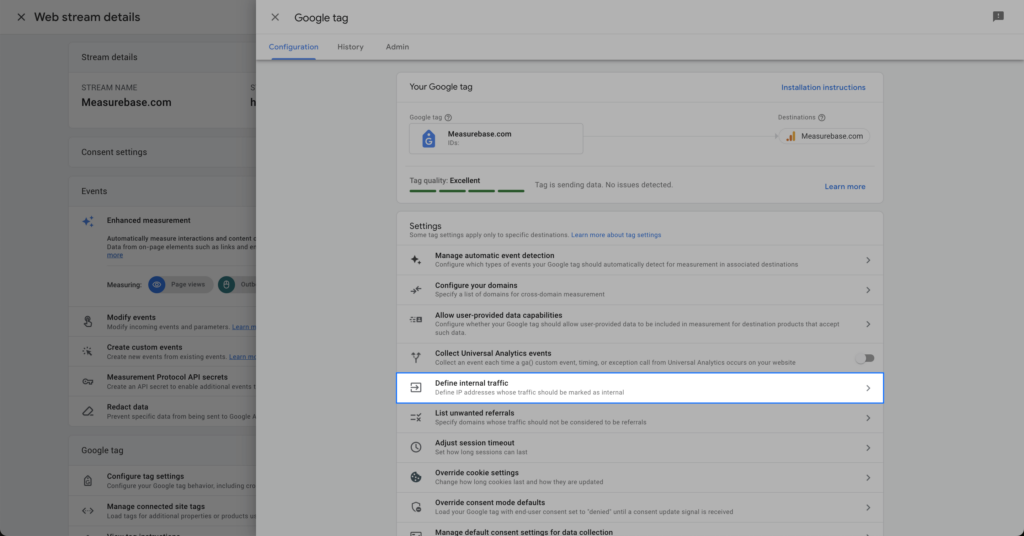
Step 3: Click Show More > Define Internal Traffic.
Step 4:
- Enter a recognizable Rule name.
- You can assign a different value under traffic_type value, but the default “internal” works fine in a lot of cases.
- Choose a Match type, such as “IP address equals”.
- Enter your IP address under Value.
- Click Create.
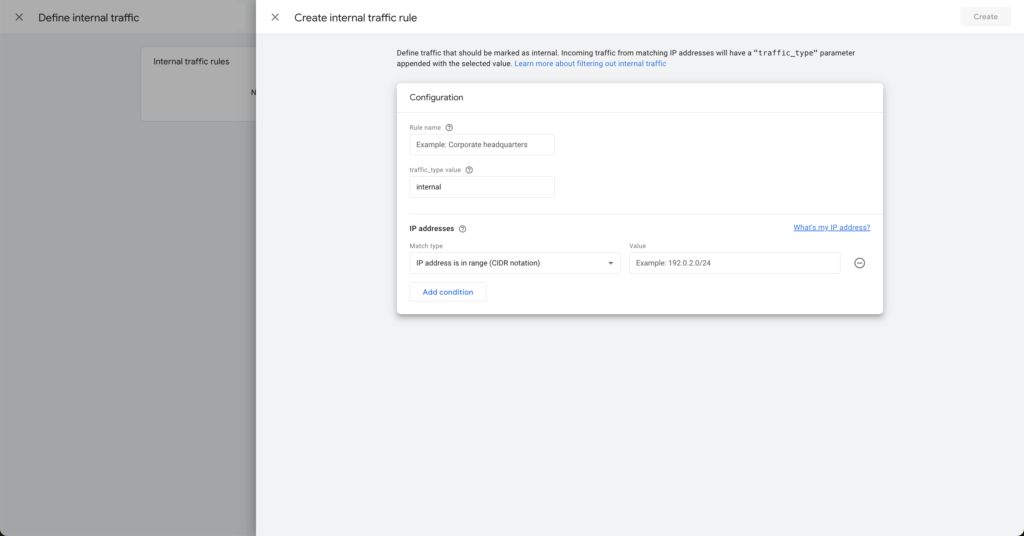
Don’t know your IP address? Click the link on the right side: “What’s my IP address?”.
Part 2: Configure Data Filters
Defining internal traffic (which we did in part 1) isn’t yet enough because you’ll also have to add them as data filters.
Step 1: Go to Admin > Data Settings > Data Filters.
Step 2: Edit the existing filter / add a new filter
Filters only work when their status is set to Active.
By default, an “Internal Traffic” filter is set to Testing. You’ll need to activate it first. You can activate a filter by clicking on the three dots in the overview or by editing the filter (by clicking on it).
When editing a filter you’ll have the following options:
- Filter type: you can choose between “Developer traffic” or “Internal traffic”.
- Data filter name: you can choose any name here
- Filter operation: you can choose between “Exclude” or “Include only”.
- Parameter value: this had to be the same as the traffic_type value that you’ve used when defining internal traffic.
- Filter state: you’ll have to choose between “Active”, “Inactive” and “Testing”.
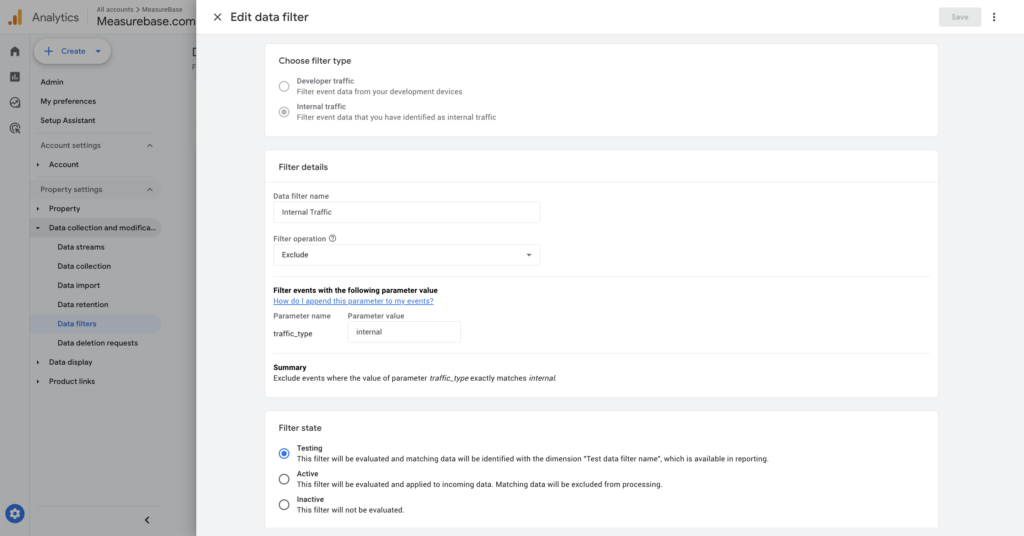
If you use a different traffic type when defining IP filters, create a new filter to exclude that specific traffic type.
Once you’ve activated a filter, you can deactivate it and later set it back to Testing or Active. While the filter is active, you won’t see your own visits in the DebugView.
