In my previous blog article, I've shown you how to create a new GA4 property. In this second article, I'll show you how to implement GA4 through Google Tag Manager in a simple, step-by-step walkthrough.
Create a Google Tag Manager account first
Do you already have a Google Tag Manager account. If you don’t have this yet, create a Google Tag Manager account before reading this blog.
How to create a Google Analytics 4 tag in Google Tag Manager?
Step 1: Go to Google Tag Manager, log in with your Google account & select the correct account.
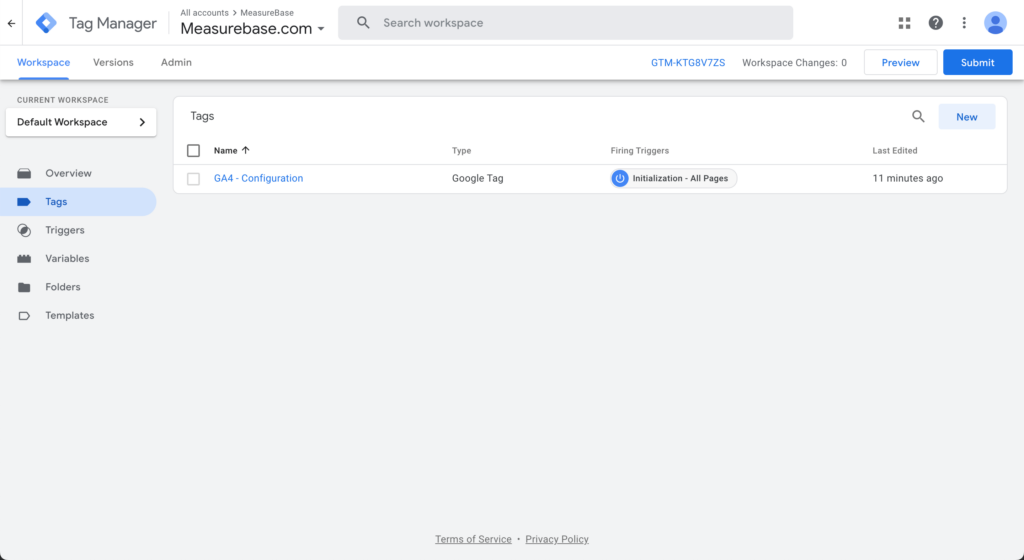
Step 2: Go to ‘Tags’ and click the ‘New’ button at the top right to create a new tag.
Step 3: Give your new tag a name, this name is only important so that you understand what the tag means.
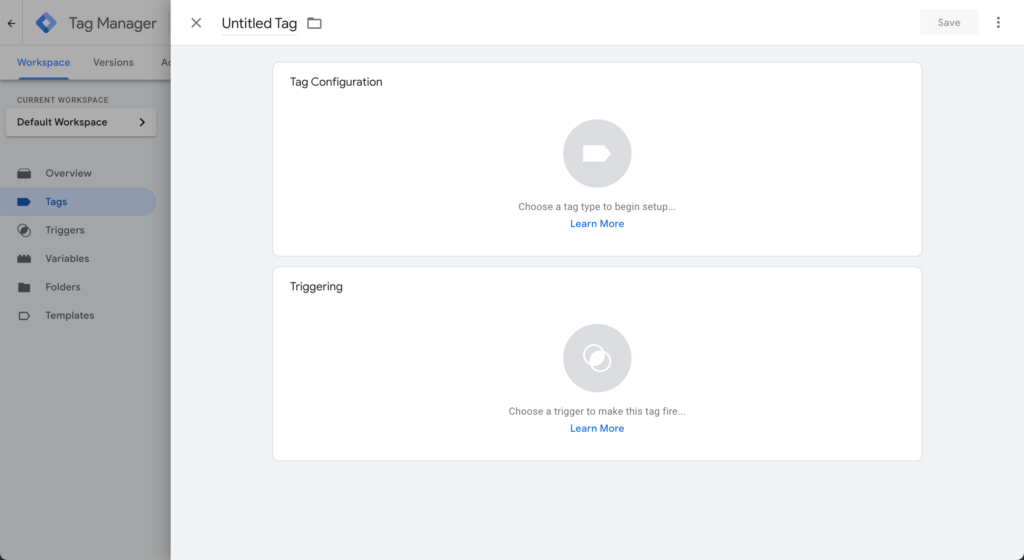
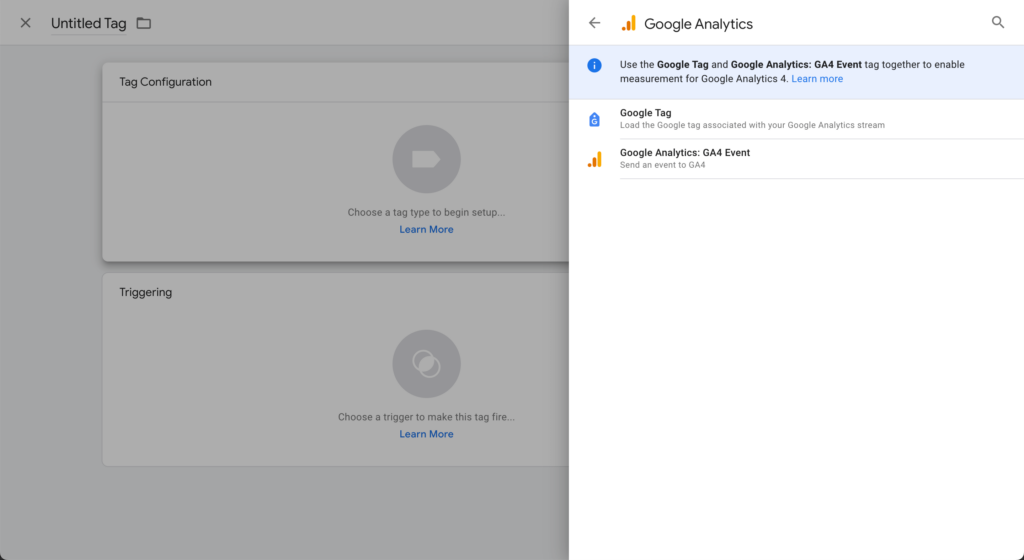
Step 4: Click on the Tag Configuration block. Select the following tag: “Google Analytics”.

Step 5: Next, choose the “Google Tag” tag type.
Step 6: Enter your Measurement ID under Tag ID. You can find your Measurement ID in Google Analytics when you go to your Google Analytics 4 property and click on ‘Admin’ at the bottom left. Then click on ‘Data Streams’ in the right column and click on the stream. At the top right you will see the Measurement ID.
Step 7: Under Configuration Settings add a Configuration parameter send_page_view and set te Value to true like in the screenshot below.
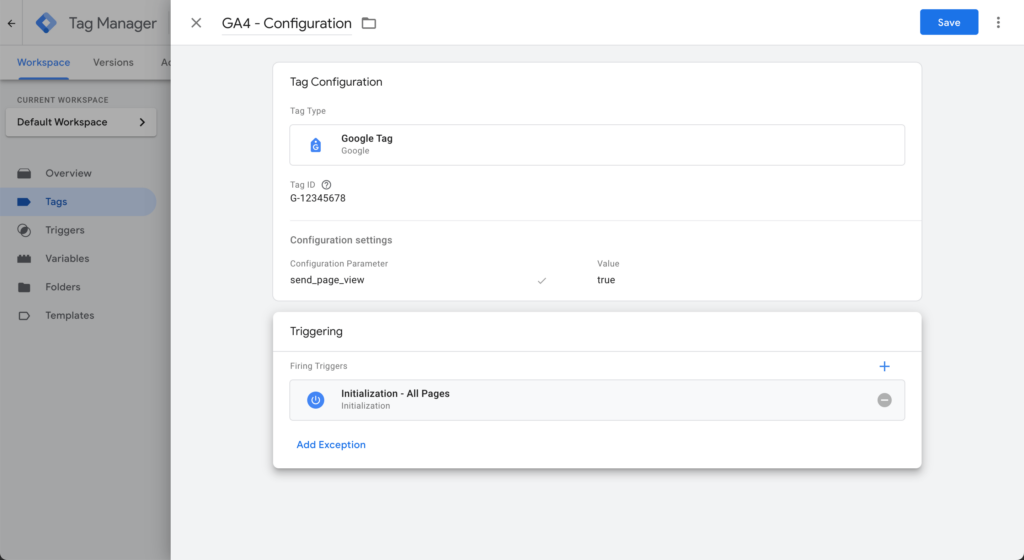
Step 8: Click on the Triggers block. Select ‘Initialization – All Pages’.
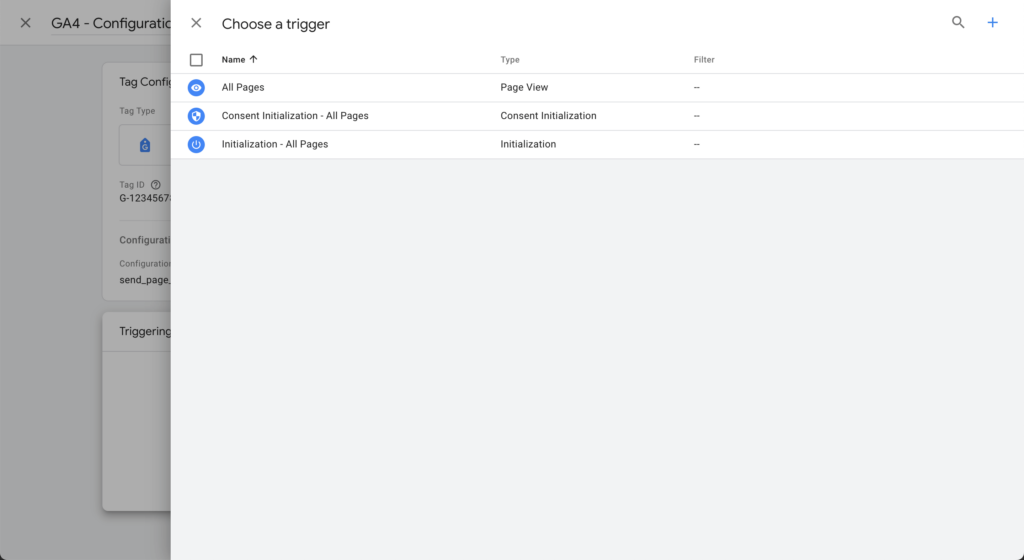
Step 9: Click on ‘Save’ at the top right.

Step 10: Don’t forget that it’s important to publish all changes. Then click again at the top right on ‘Submit’. The name of the version you have to specify is only important for yourself, nothing else depends on it. Finally, click ‘Publish’ to publish the new tags.
